
These days, you don’t learn suturing only during clinical rotations. By the time you enter the OR or the ER, people expect you to already have basic skills. That’s why having your own suture practice kit isn’t just helpful—it’s essential.
Your program might offer workshops, but limited time and shared tools won’t give you the consistent practice needed to build real muscle memory.
With a good practice kit at home, everything changes. You can practice as much as you want and sharpen your technique long before it truly counts.
In this blog post, we’ll cut through the noise and highlight the key features that make a suture practice kit worth your time (and your budget).
Why is Investing in a High-Quality Suture Kit Crucial for Medical Students?
When you’re a student on a tight budget, spending a lot on practice gear can feel unnecessary. You might think, “I’ll just wait for lab sessions,” or grab the cheapest kit and hope it’s enough.
But here’s the problem. The quality of your early practice shapes the habits and skills you’ll rely on for the rest of your career. So why is it worth investing in a better kit from the start?
Building Muscle Memory
Think of a suture kit like an instrument that never stays in tune. You might keep practicing, but something always feels off. And instead of building real skill, you end up adjusting to the flaws of the tool.
Every hour spent on low-quality tools builds muscle memory that won’t help you in real clinical situations.
A foundational paper argues that expert performance is the result of prolonged, structured, effortful practice — not simply innate talent or unstructured repetition.
In the context of surgery, this means practicing on a simulator or a high-quality suture kit, rather than just repeating the same motions over and over.
The Cost of Cheap Kits
The problems with cheap kits become clear quickly. For example, loose needle holders make you grip too hard, which causes hand fatigue and sloppy movements in real procedures.
Pads that lack proper layers don’t mimic the feel of real tissue, and low-quality thread that snaps or handles differently from surgical material wastes your practice time.
Altogether, these issues can build bad habits that are hard to unlearn.
What Critical Components Should You Demand in a Suture Practice Kit?
Not all suture kits are created equal, and knowing what separates excellent from merely adequate can save you both money and frustration.
Let’s break down the essential components that deserve your attention.
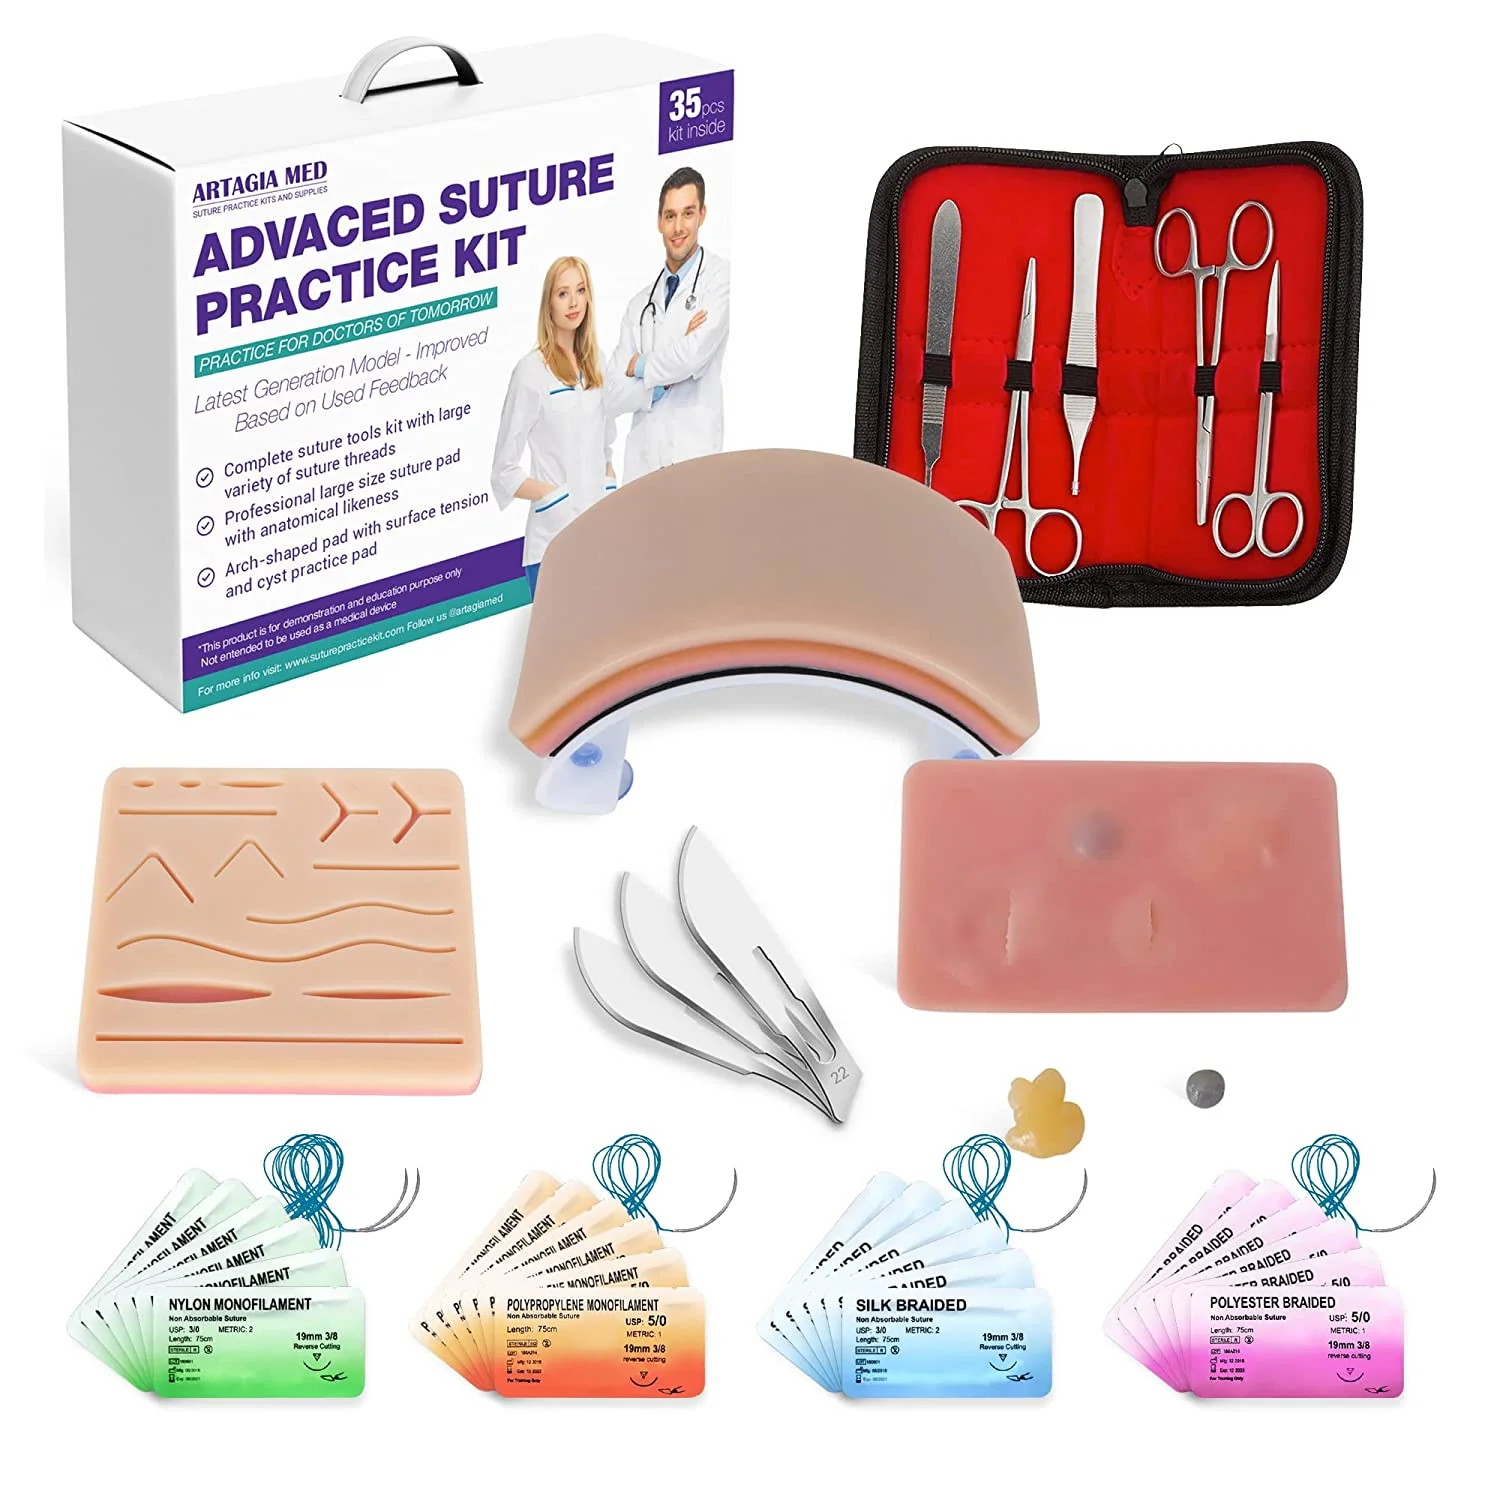
Instrument Quality
First and foremost, the quality of your instruments matters most. Stick to stainless steel and avoid cheaper alloys that corrode or lose precision. Pay special attention to the needle holder because it is your main tool for guiding the needle through tissue.
Mayo-Hegar style holders are ideal since their reliable locking mechanism grips firmly without extra effort, and getting comfortable with them now will help you in real clinical settings.
The Practice Pad Material
The practice pad material creates your foundation for realistic training.
Silicone pads offer easier suturing and work well for absolute beginners learning basic technique. However, they don’t provide the tissue resistance you’ll encounter with patients.
Synthetic tissue pads, while slightly more challenging, deliver that realistic feel that prepares you for actual clinical work.
The best pads have layers that mimic skin, fat, and fascia. This helps you learn how to adjust your technique and suture placement for different tissue depths.
Suture Thread Variety
Suture thread variety gives you exposure to different materials you’ll use throughout your career. Your kit should include both absorbable and non-absorbable training thread so you can learn how each type handles differently.
For starting out, focus on 3-0 and 4-0 sizes, which cover the majority of wound closure scenarios you’ll encounter early on.
The 3-0 works well for deeper layers and areas requiring more strength, while 4-0 suits more superficial closures where cosmetic outcomes matter.
Which Suture Kits Are Ideal for Different Medical Student Needs?
Understanding your specific needs helps narrow down the overwhelming number of options available. Your choice should align with where you are in your training and what goals you’re working toward.
Perfect Budget Kit
Budget kits usually cost between $20 and $25 and include just the essential instruments. They’re great for beginners who want to learn basic suturing and get comfortable with the tools.
Make sure the kit has a good needle holder and at least 15 to 20 pieces of suture thread. The practice pads are usually simple single-layer silicone. This is fine for starting out even if it’s less realistic than higher-end options.
Perfect Value/Mid-Range Kit
Mid-range kits cost around $30 to $40 and offer great value for most medical students. They include more instruments, like different forceps, scissors, and higher-quality multi-layer pads that feel more like real tissue.
You’ll also get a wider variety of suture threads in different materials and sizes.
These kits are ideal for students who want to build strong skills without going all-in on surgical specialization.
Ideal Premium/Clinical Prep Kit
Suture practice kits start at around $45 and go up in price based on quality and included instruments. Premium kits give you everything you need to prepare for surgical residencies.
They include specialized tools like micro-needle holders, advanced multi-layer pads with different tissue types, and professional-grade suture materials like those used in the OR.
If you’re aiming for a surgical specialty, the suture practice kit for medical students from Artagia Med helps you build skills faster and demonstrates the dedication residency programs look for. It’s affordable while still providing high-quality instruments and materials.
How Can You Maximize Your Suture Kit’s Lifespan and Durability?
Investing in quality equipment means nothing if you don’t maintain it properly. Fortunately, caring for your practice kit requires minimal effort while significantly extending its usefulness.
Here’s how to care for your practice kit step by step:
Step 1: Clean your instruments
After each practice session, wash your instruments with soap and water. Wiping them with isopropyl alcohol helps prevent buildup on locking mechanisms and cutting edges. Keep them in a dry place, preferably in their case, to maintain precision.
Step 2: Use your practice pad wisely
Rotate between different sections instead of stitching the same spot over and over. This helps the pad last longer and keeps your practice realistic.
Step 3: Move to fresh areas when needed
When a section is too worn, mark it and switch to a new area. Good-quality pads can last many sessions, unlike cheap ones that wear out quickly.
Final Thoughts
Choosing the right suture practice kit is one of the smartest investments you can make in your medical training. The skills you build now with focused, quality practice will boost your confidence and help you perform better with patients.
Don’t let a tight budget lead you to low-quality equipment that wastes time and teaches bad habits. Invest in a good kit today and give yourself the best chance to succeed.